Microsoft Entra ID
Microsoft renamed Azure Active Directory to Microsoft Entra ID in 2023. The configuration steps below are unchanged regardless of which name your Azure portal currently shows.
Configure Microsoft Entra ID Integration using SAML
Follow these steps to configure the Microsoft Entra ID Integration for your Levo organization. This will allow you to use Entra ID to login to the platform.
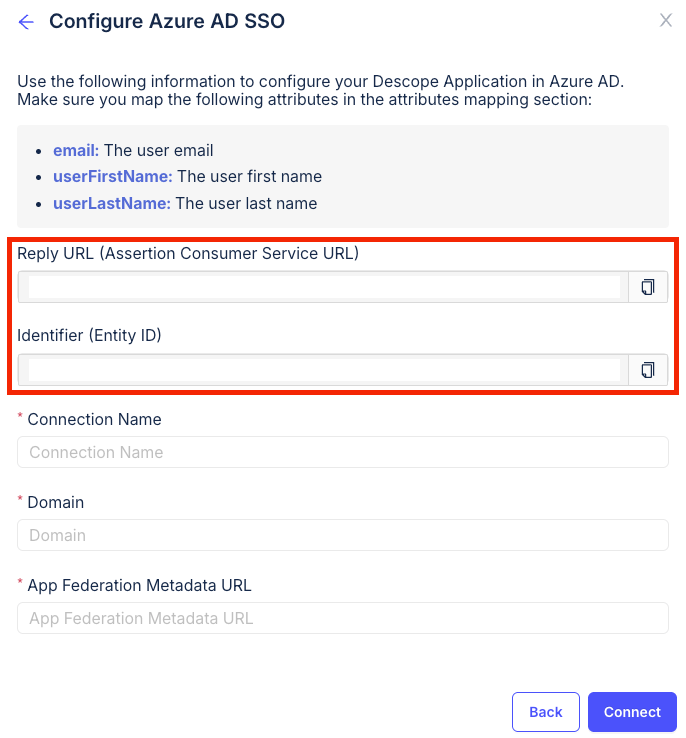
- Navigate to User Settings > Organizations in the Levo Dashboard. Select your organization and navigate to the SSO tab. Click on Configure SSO and then select Azure AD / Microsoft Entra ID.
- Copy the Assertion Consumer Service URL (ACS URL) and Entity ID. These will be used during the Entra ID app creation.
- Navigate to the Azure Portal and sign in with your administrator account.
- Go to Microsoft Entra ID > Manage > Enterprise applications > New application.
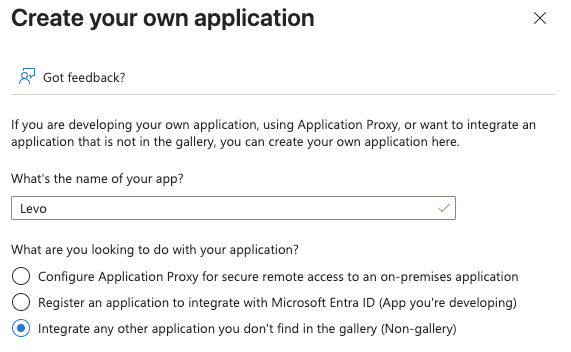
- Click on Create your own application.
- Enter Levo as the application name, select Integrate any other application you don't find in the gallery (Non-gallery), and click Create.
- Once the application is created, navigate to Single sign-on from the left menu and select SAML as the sign-on method.
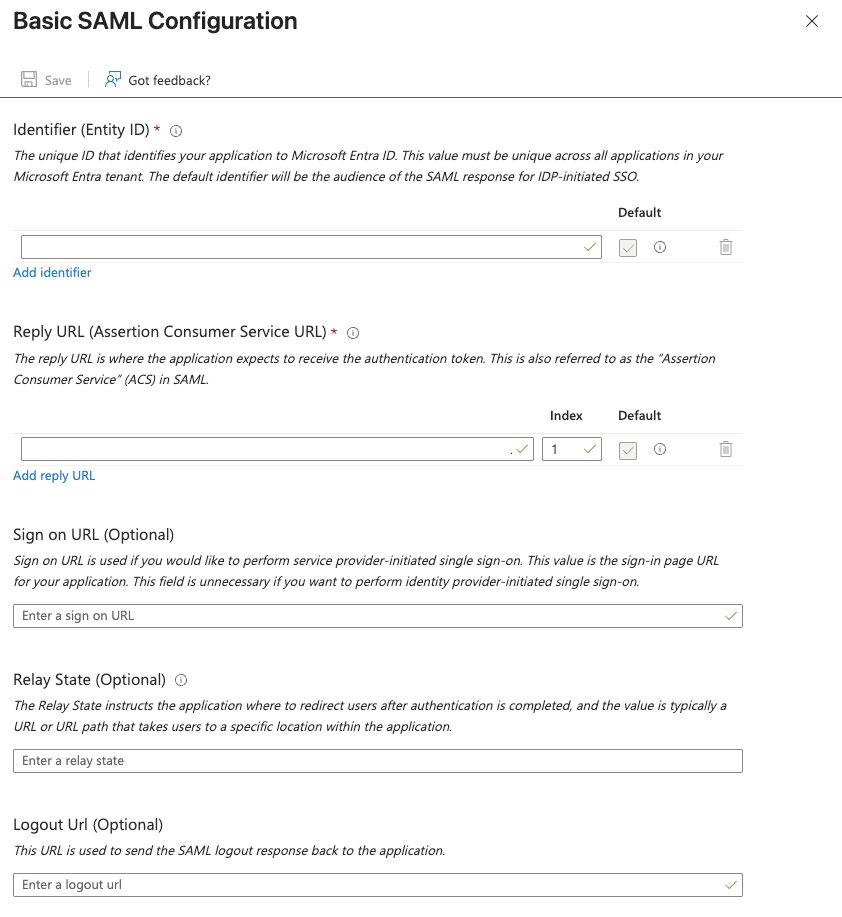
- In the Basic SAML Configuration section, click Edit and configure the following:
- Identifier (Entity ID): Paste the Entity ID you copied from Levo in step 2.
- Reply URL (Assertion Consumer Service URL): Paste the ACS URL you copied from Levo in step 2.
- Click Save.
- In the Attributes & Claims section, click Edit and ensure the following claims are configured (without namespaces):
- Unique User Identifier (Name ID):
user.userprincipalname(Format: Email address) - email:
user.userprincipalname - name:
user.displayname - userFirstName:
user.givenname - userLastName:
user.surname
- Unique User Identifier (Name ID):
- In the SAML Certificates section, locate the App Federation Metadata Url and copy it. This will be used in Levo configuration.
- Under Users and groups in the left menu, click Add user/group to assign the relevant users and groups to your new application.
- (Optional) Update the application logo with the Levo logo under Properties so you can easily identify it in your Entra ID portal.
- Go back to Levo and fill in the details to connect your Entra ID app:
- Connection Name: An identifier for the connection.
- Domain: Email domain of your organization users.
- App Federation Metadata URL: The App Federation Metadata URL you copied from Entra ID.
After that, you should be able to use this custom app to login to Levo using Entra ID.
- Navigate to Microsoft MyApps and sign in with your Entra ID credentials.
- Click on the Levo app icon to be redirected to the Levo Dashboard.
- Alternatively, navigate to Office 365 Apps and then click on Levo to be redirected to the Levo Dashboard.
Was this page helpful?