Create a Scan
The Create DAST Scan dialog walks you through five steps: Select Mode, Authentication, Crawling & Discovery, Security Testing, and AI / LLM Key. Every section below maps 1:1 to what you see in the UI.
The Quickstart runs this flow with all defaults in 5 minutes. Come back here when you need to customize.
Open the dialog
- Go to Scans → DAST Scans.
- Click + DAST Scan in the top right.
- The Create DAST Scan dialog opens on Step 1.
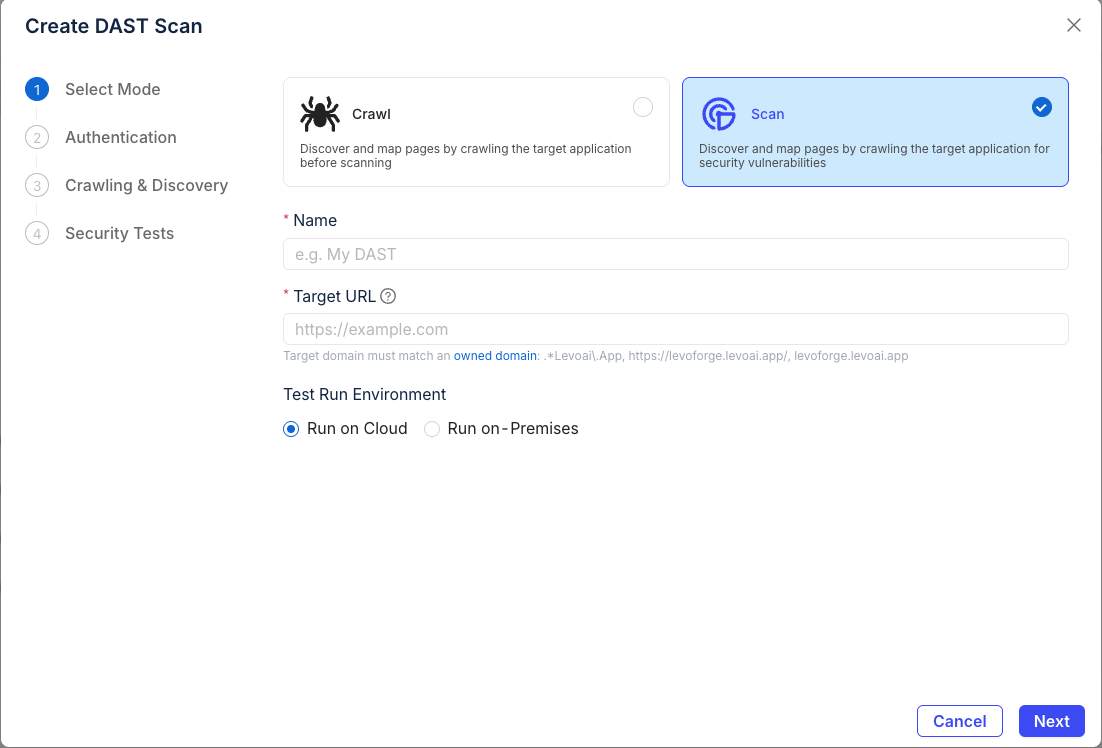
Step 1 — Select Mode
Mode
| Mode | What it does | When to use |
|---|---|---|
| Crawl | Discovers and maps pages only. No payloads sent. | You want an attack-surface map without any active testing. |
| Scan (recommended) | Crawls and runs passive + active security tests. | Normal security testing. |
Name
A descriptive label so you can find this run later. Examples:
staging-checkout-weeklyapi-v2-post-deploymarketing-site-passive
Target URL
The full URL the scan starts from (e.g., https://app.example.com).
The target domain must match one of your organization's owned domains (shown under the field as a list of regex patterns). Add new domains under Settings → Owned Domains before scanning.
Test Run Environment
- Run on Cloud — Levo's managed infrastructure. No setup. Recommended for anything reachable from the public internet.
- Run on-Premises — Your own Kubernetes worker or Docker worker. Required for targets behind your firewall.
Click Next to continue.
Step 2 — Authentication
Pick whether the scan needs to log in, and if so, how.
Scan mode
| Option | What it does | When to use |
|---|---|---|
| Unauthenticated Scan | Crawls only the publicly reachable pages — no login required. | Public sites, marketing pages, open APIs. |
| Authenticated Scan | Provides credentials so the scanner can reach pages behind login. | Anything with a login wall. Reveals the four method cards below. |
Authentication method
When you pick Authenticated Scan, four method cards appear. See the dedicated Authentication section for in-depth guidance on each.
Username and password
For apps with an HTML login form. Fill in:
- Login URL — the page that hosts the login form. Tick "Login URL is the same as target URL" to skip this when the form lives on the URL you're scanning.
- Username, Password — a test account. Create one dedicated to scanning.
- Pre-Auth Cookies / Headers / Local Storage — optional; see below.
Token Based
For APIs that accept a Bearer token, JWT, or API key in the Authorization header. Paste the full token value — the scanner prefixes it with Bearer automatically unless you include your own scheme.
Browser session
Reuse an existing logged-in browser session instead of having the scanner authenticate. Useful when the scan account uses MFA, an SSO flow, or any login the scanner can't replay on its own.
Under Session input, choose one of three modes:
- Session transplant — upload a JSON file exported by the Levo browser extension. Captures cookies (with full
domain/path/httpOnly/SameSiteattributes) pluslocalStorageandsessionStorage. Most reliable for strict apps. - JSON upload / paste — paste a session-export JSON blob into Session JSON, or click Upload JSON to load it from a file. Use this when your tool produces a custom-shape JSON.
- Enter manually — fill the Cookies, Headers, Local Storage, and Session Storage tables row-by-row (Key / Value). Use when you grabbed values straight from DevTools.
The CLI exposes the same feature via --auth-session-file ./session.json (or the SHADOWNET_AUTH_SESSION_FILE env var). See Browser session for the JSON shape, capture tips, and field-level guidance.
AI-assisted login
The scanner uses an LLM to identify the login flow, fill the form, and verify login. Use when the auth flow is complex, multi-step, or you don't want to hard-code selectors. Requires an LLM key — see Step 5 (AI / LLM Key).
Pre-Auth Cookies, Headers, and Local Storage
Values that must be in place before the scanner attempts login — typical use cases:
- Pre-Auth Cookies — CSRF tokens, tenant selectors, feature flags needed on the login page.
- Pre-Auth Headers — custom tenant headers (e.g.,
X-Tenant-Id), API gateway tokens. - Local Storage Items — SPA bootstrap data the app reads on first load.
- Local Storage Items (Base64) — same, for apps that store encoded blobs in
localStorage.
Add rows with + Add Row. Leave empty if your app doesn't need any of these.
Click Next to continue.
Step 3 — Crawling & Discovery
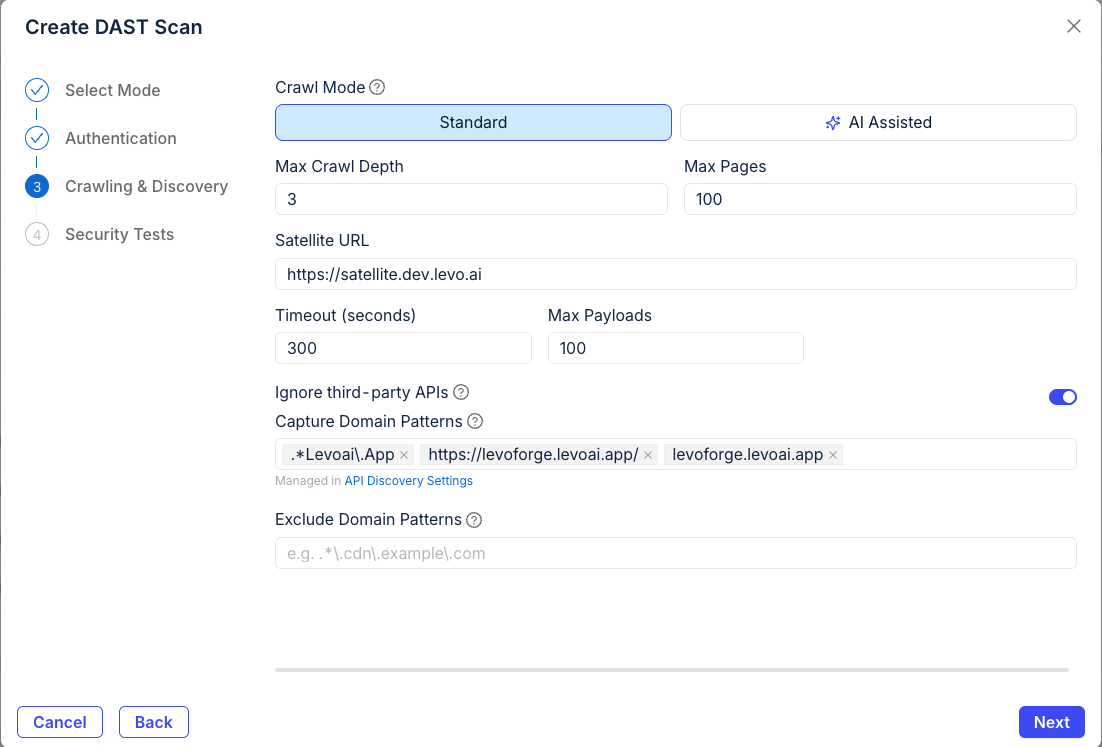
Crawl Mode
- Standard — HTTP-based crawler following links and forms. Fast. Good default.
- AI Assisted — LLM-driven crawler that follows UI flows the Standard crawler misses (wizards, modals, JS-heavy SPAs). Slower, requires an LLM key (configured in Step 5 — AI / LLM Key).
Max Crawl Depth · Max Pages
Bounds on crawl breadth. Defaults (depth 3, 100 pages) suit most apps. Raise both for very large sites; lower them to keep a scheduled run under a time budget.
Satellite URL
For on-prem deployments that route traffic through the Levo Satellite HAProxy. Leave empty if you aren't using a Satellite. See Install Satellite for setup.
Timeout · Max Payloads
- Timeout (seconds) — per-request timeout. Raise for slow backends.
- Max Payloads — upper bound on active-test payloads per endpoint. Lower for production-adjacent targets; raise for thoroughness.
Domain filtering
- Ignore third-party APIs (on by default) — skips external hosts so you don't accidentally scan a vendor.
- Capture Domain Patterns — additional hosts to include. Managed alongside API Discovery settings.
- Exclude Domain Patterns — hosts to skip (CDNs, analytics, anything you don't own).
Click Next to continue.
Step 4 — Security Testing
Scan depth
| Speed | Coverage | Use when | |
|---|---|---|---|
| Smart (default) | Fast | Common, high-confidence issues | You run scans often (every PR, nightly). |
| Thorough | Slow | Deep attack surface, more payload variants | Release scans, pen-test prep, weekly deep runs. |
Test types
| Toggle | Default | What it does |
|---|---|---|
| Passive Scanning | On | Inspects responses for misconfigurations. Safe for prod. |
| Active Scanning | On | Sends injection payloads. Can modify state. |
| CVE Scanning | Off | Checks for known CVEs. Enables the two toggles below. |
| JavaScript Libraries | Off | Detects vulnerable client-side library versions. |
| DOM | Off | Tests DOM-based XSS and client-side injection. |
Active tests can submit forms, create records, and trigger alerts. Run them against staging. If you must scan production, follow Scanning production safely.
Injection Locations
Where payloads are inserted. All five are on by default — turn off any that don't apply to cut scan time.
- Query — URL query-string params.
- Body — request body params.
- Header — custom headers.
- Cookie — cookie values.
- Path — URL path segments.
HTTP Methods
Which HTTP verbs the scanner will test. GET, POST, PUT are on by default. DELETE, PATCH, HEAD, OPTIONS are off — turn on explicitly if you want them tested.
Enable AI-powered analysis
On by default. Runs LLM validation against findings to reduce false positives. Costs more tokens (against either Levo's platform key or your BYOK key — set in Step 5).
Click Next to continue.
Step 5 — AI / LLM Key
Choose which LLM API key the scanner uses for the AI-powered features selected in earlier steps:
- AI-assisted login — Step 2
- AI Assisted crawling — Step 3
- AI-powered analysis — Step 4
Options:
- Levo's Platform Key (default) — use Levo's managed LLM. No setup required.
- Bring Your Own Key — your own OpenAI or Anthropic key, managed under Settings → API Keys.
If none of the AI features are enabled in earlier steps, this selection has no effect.
Create the scan
- Review settings — use Back to edit earlier steps.
- Click Create.
- You're redirected to the scan detail page and the scan starts automatically.
Next steps
- Monitor scan progress
- View and manage findings
- Schedule this scan to re-run
- Automate the same config in CI with
levo-dast.yml