WSO2
WSO2 Integration
This integration pushes API definitions generated by Levo directly into a self-hosted WSO2 API Manager as new APIs. Levo continuously discovers endpoints from live traffic and generates an OpenAPI spec for each Application — this connector lets you take a set of discovered endpoints for one Application and publish them into WSO2 as a draft API, without hand-authoring the spec yourself.
A push creates one new WSO2 API per push, built from the selected endpoints. It is a one-way, on-demand action:
- Create only. If a matching API (same context path and version) already exists in WSO2, Levo skips it rather than overwriting anything already deployed in your gateway.
- Manual trigger. Levo does not automatically push newly discovered endpoints — you choose what to push and when.
- One direction. This connector only pushes from Levo into WSO2. It does not import or discover APIs that already live in WSO2.
- Draft state. APIs are created in WSO2 in
CREATEDstate. Publishing, deploying, and configuring policies or rate limits on the resulting API is done in WSO2 itself. - Up to 200 endpoints can be pushed in a single request.
- Tested against WSO2 API Manager 4.7.0 (Publisher REST API v4).
Below are links to common tasks.
Add WSO2 Integration
-
Prerequisites
-
A running WSO2 API Manager instance reachable from the Levo SaaS console (Publisher REST API).
-
In your WSO2 Publisher, create an OAuth2 client (client ID and secret) that Levo will use to authenticate. Note the Publisher base URL and the OAuth2 token endpoint.
-
If your WSO2 installation uses a self-signed certificate — the common case for downloadable/on-prem installs — have the CA certificate (PEM) ready as well.
-
In the WSO2 Developer Portal (not Publisher), open
Applications, select (or create) an application, and open itsProduction Keystab. If a key hasn't been generated yet, clickGenerate Keys— make sureClient Credentialsis enabled as a grant type. TheConsumer Keyis your Client ID; click+ New SecretunderConsumer Secretsto get a Client Secret (WSO2 only shows the full secret once, at creation time). This page also shows the Token Endpoint and Revoke Endpoint.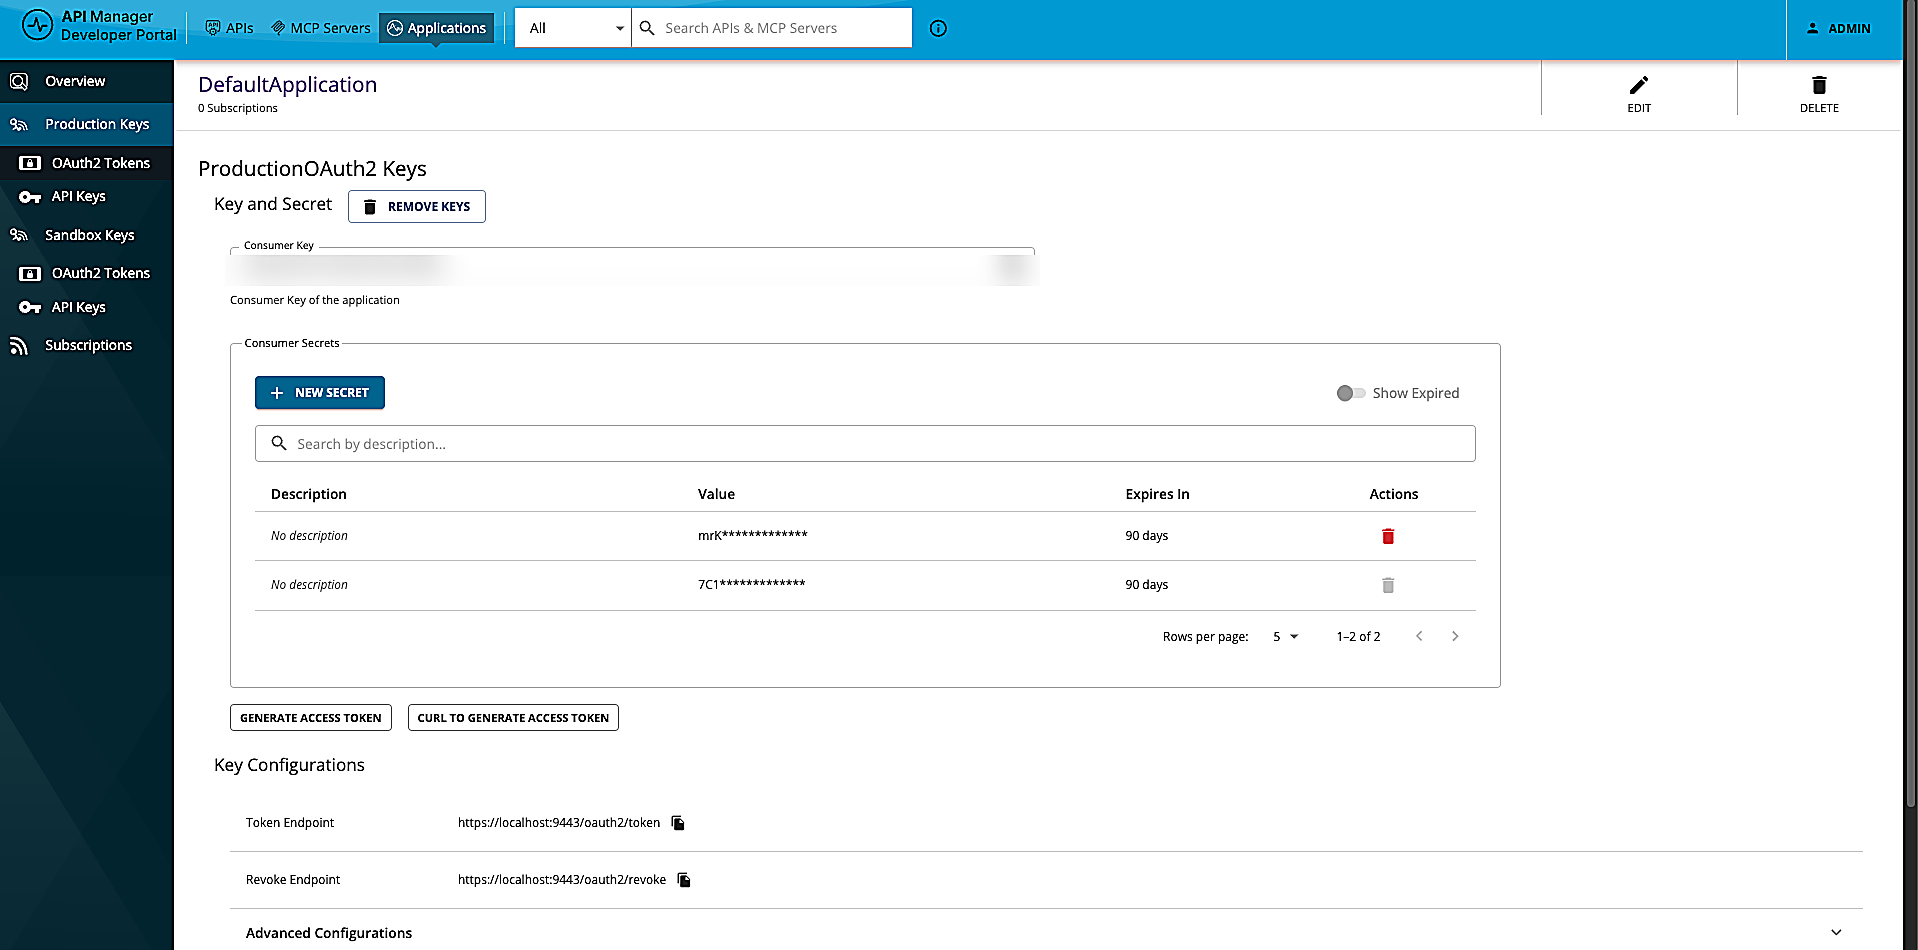
-
-
Enable WSO2 Integration
-
In the Levo SaaS console, navigate to the Integrations screen, open the
API Gatewayscategory, and clickManageon theWSO2tile.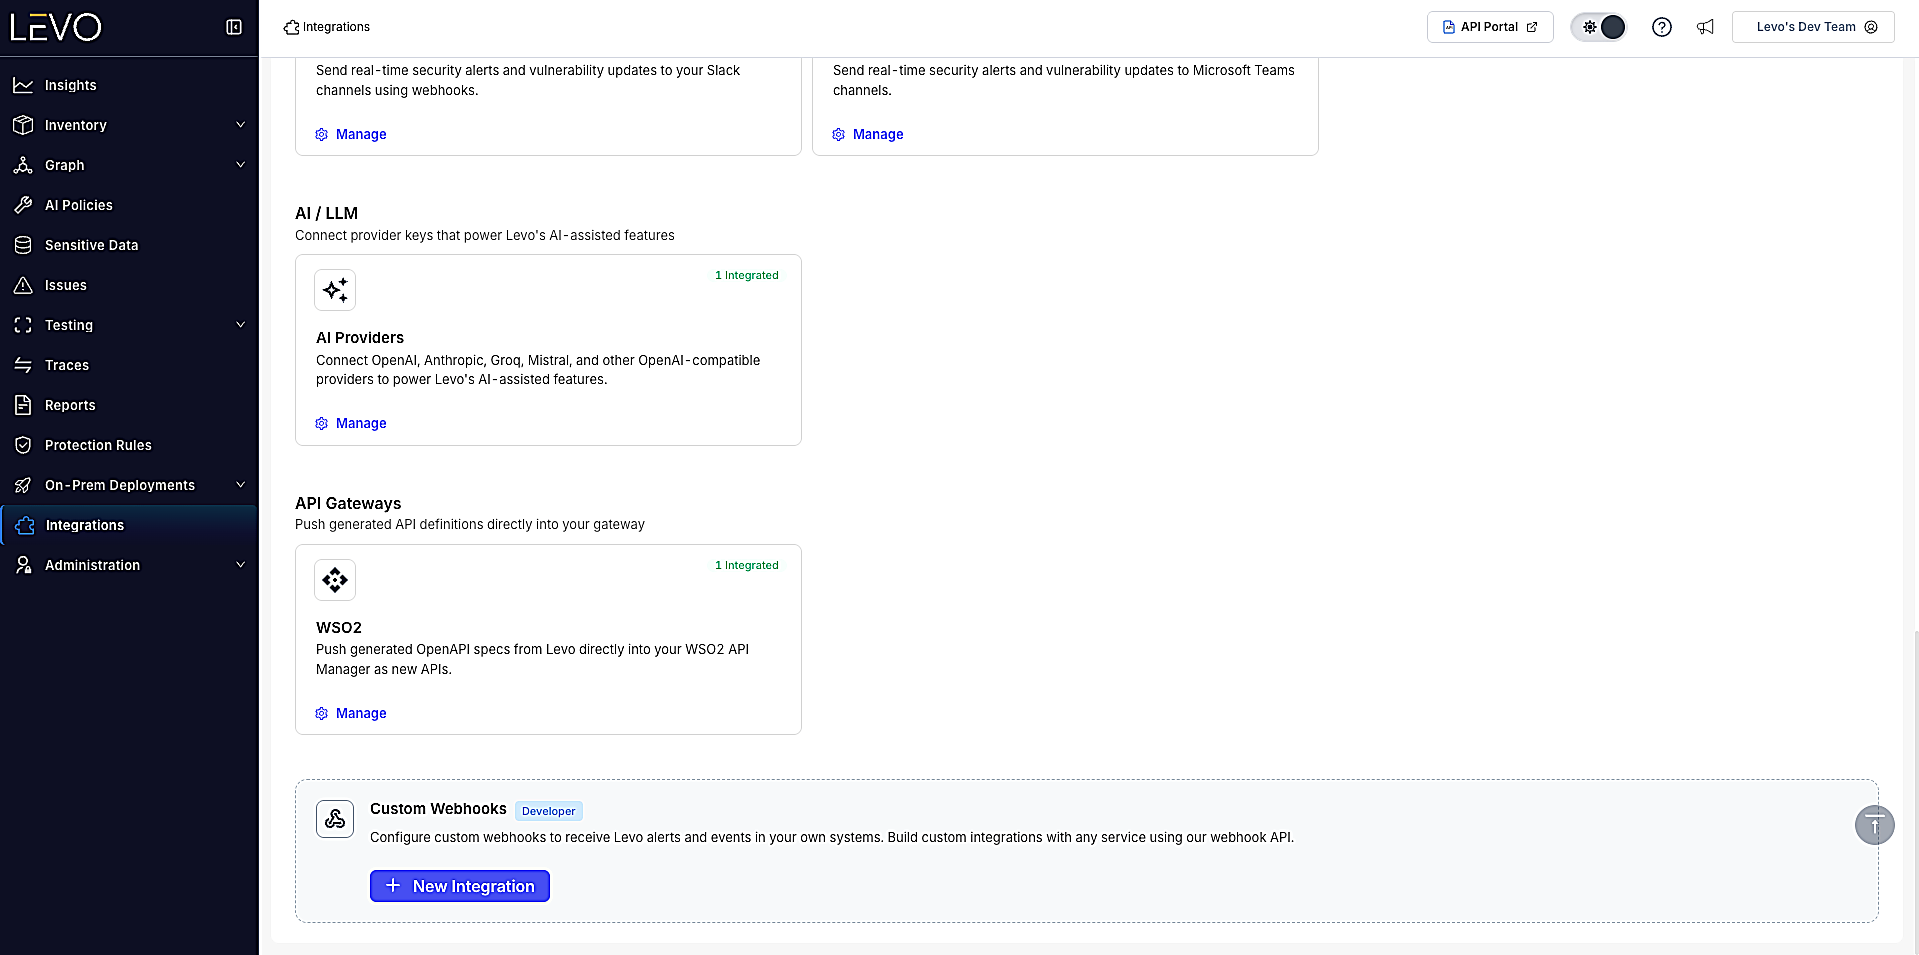
-
This opens the WSO2 detail page, listing any gateways you've already connected. Click
Add WSO2 Integration. -
Give the integration a name (for example
WSO2 Production), then fill in:Field Description Integration name A label to identify this connection. Used to detect duplicates and cannot be changed after creation. Publisher Base URL The base URL of your WSO2 Publisher, for example https://your-wso2:9443.Token Endpoint The OAuth2 token endpoint used to authenticate, for example https://your-wso2:9443/oauth2/token.Client ID The OAuth2 client ID from your WSO2 Publisher. Client Secret The OAuth2 client secret from your WSO2 Publisher. CA certificate (PEM) — optional Only needed for a self-signed WSO2 installation. 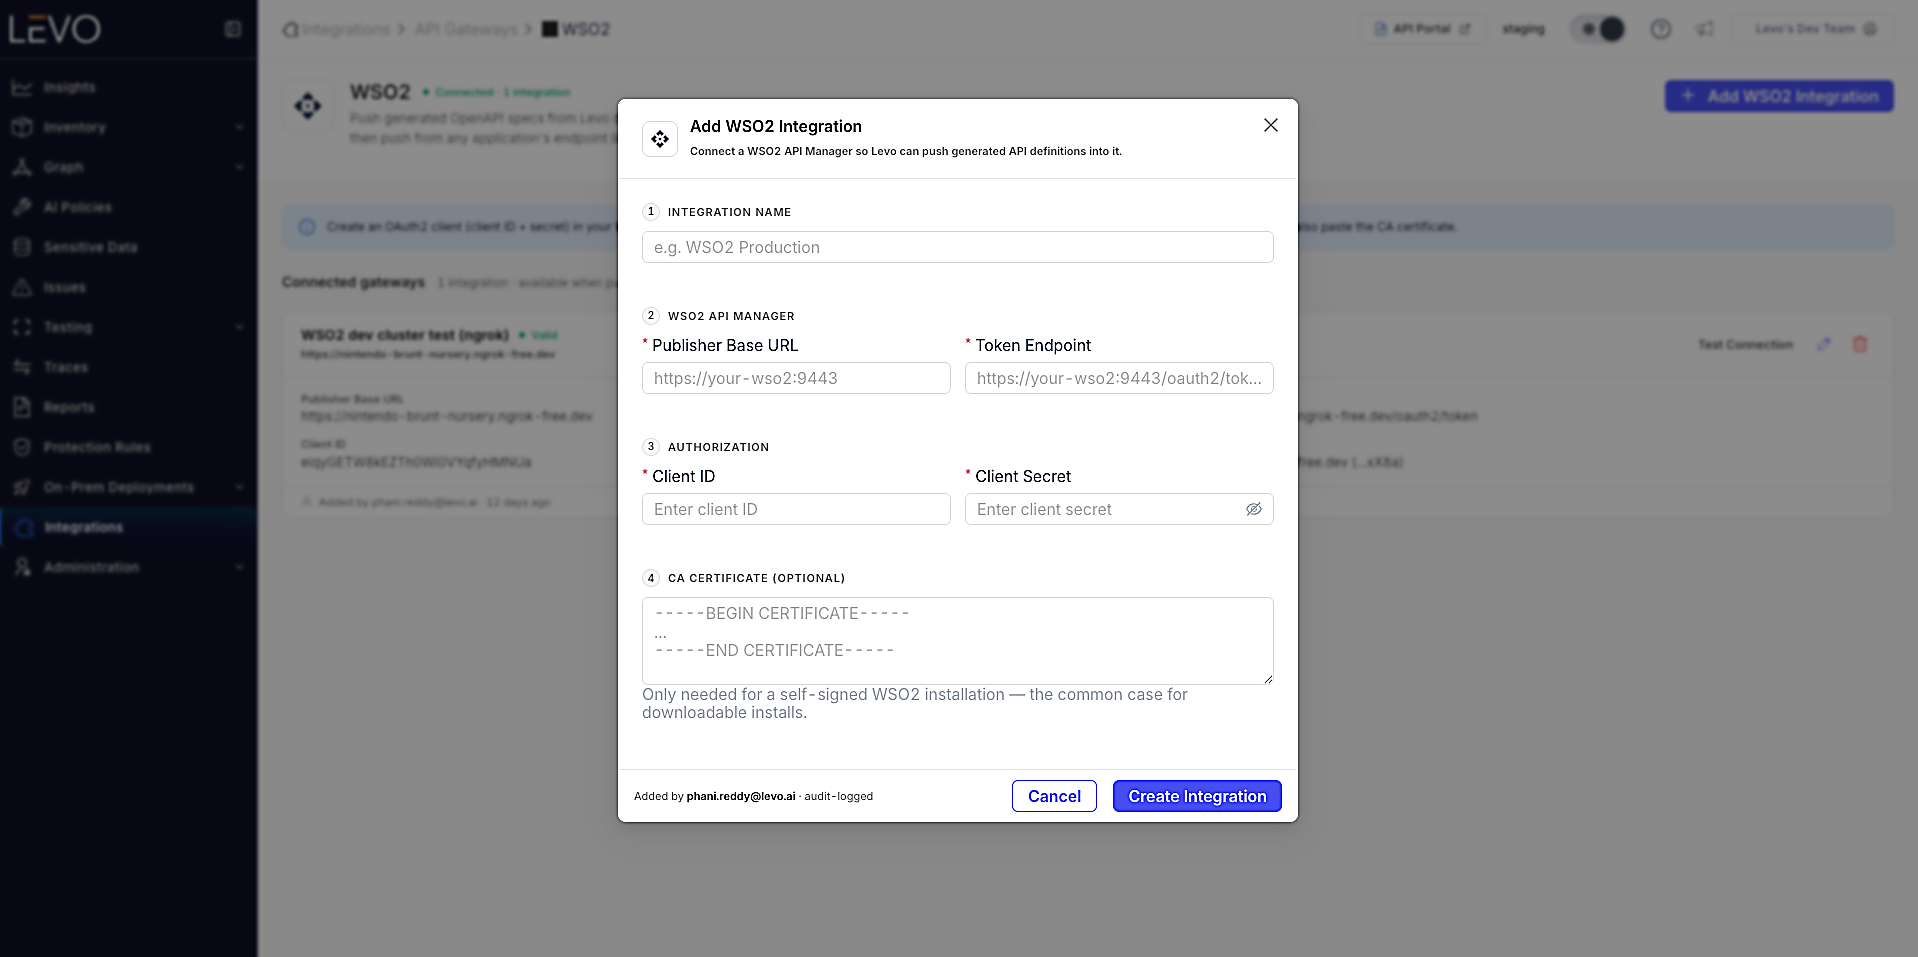
-
Click
Create Integrationto save. UseTest Connectionon a saved integration at any time to re-validate it against WSO2.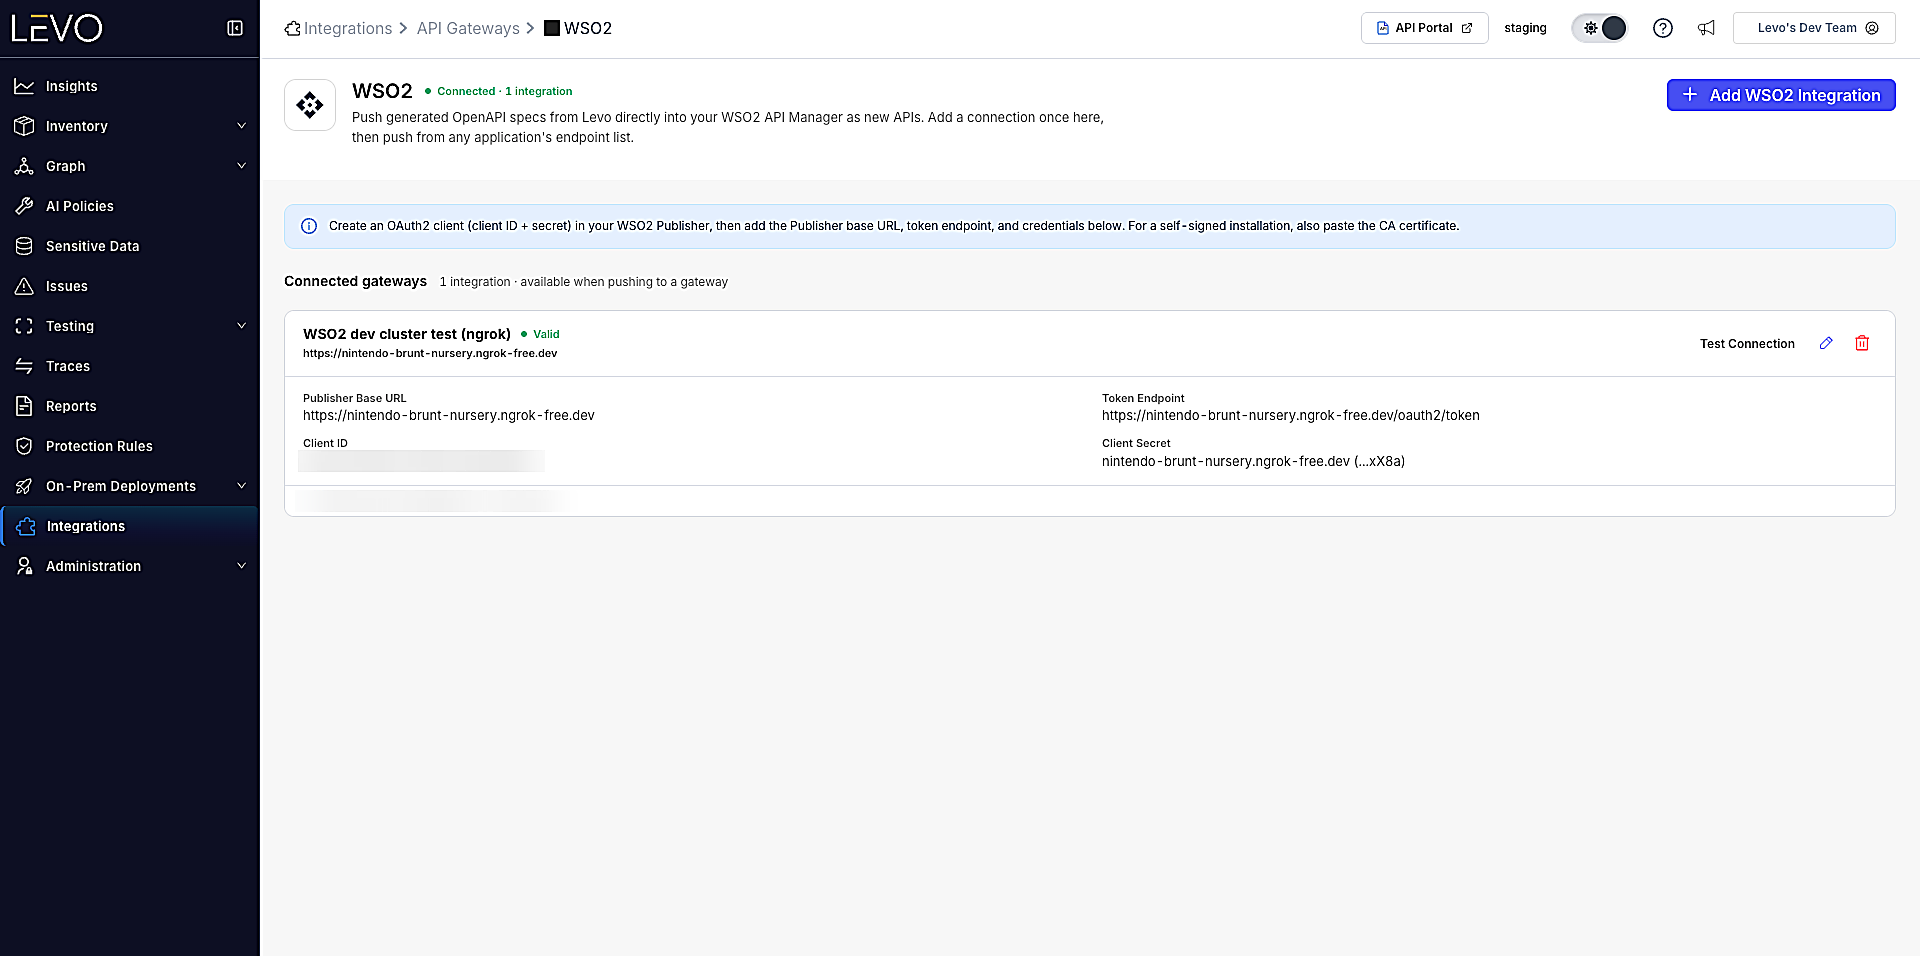
-
Both the Publisher Base URL and Token Endpoint must be plain https:// (or http://) URLs with no embedded credentials — Levo rejects URLs that include a username or password.
You can add more than one WSO2 integration, each distinguished by the name you give it. Editing an existing integration always requires re-entering the client secret; it is re-validated against WSO2 when you save.
Congratulations! You have successfully enabled the WSO2 integration. Below are steps to push discovered endpoints into WSO2.
Pushing Endpoints to WSO2
Endpoints are pushed from an Application's Endpoints page, not from the Integrations settings screen.
-
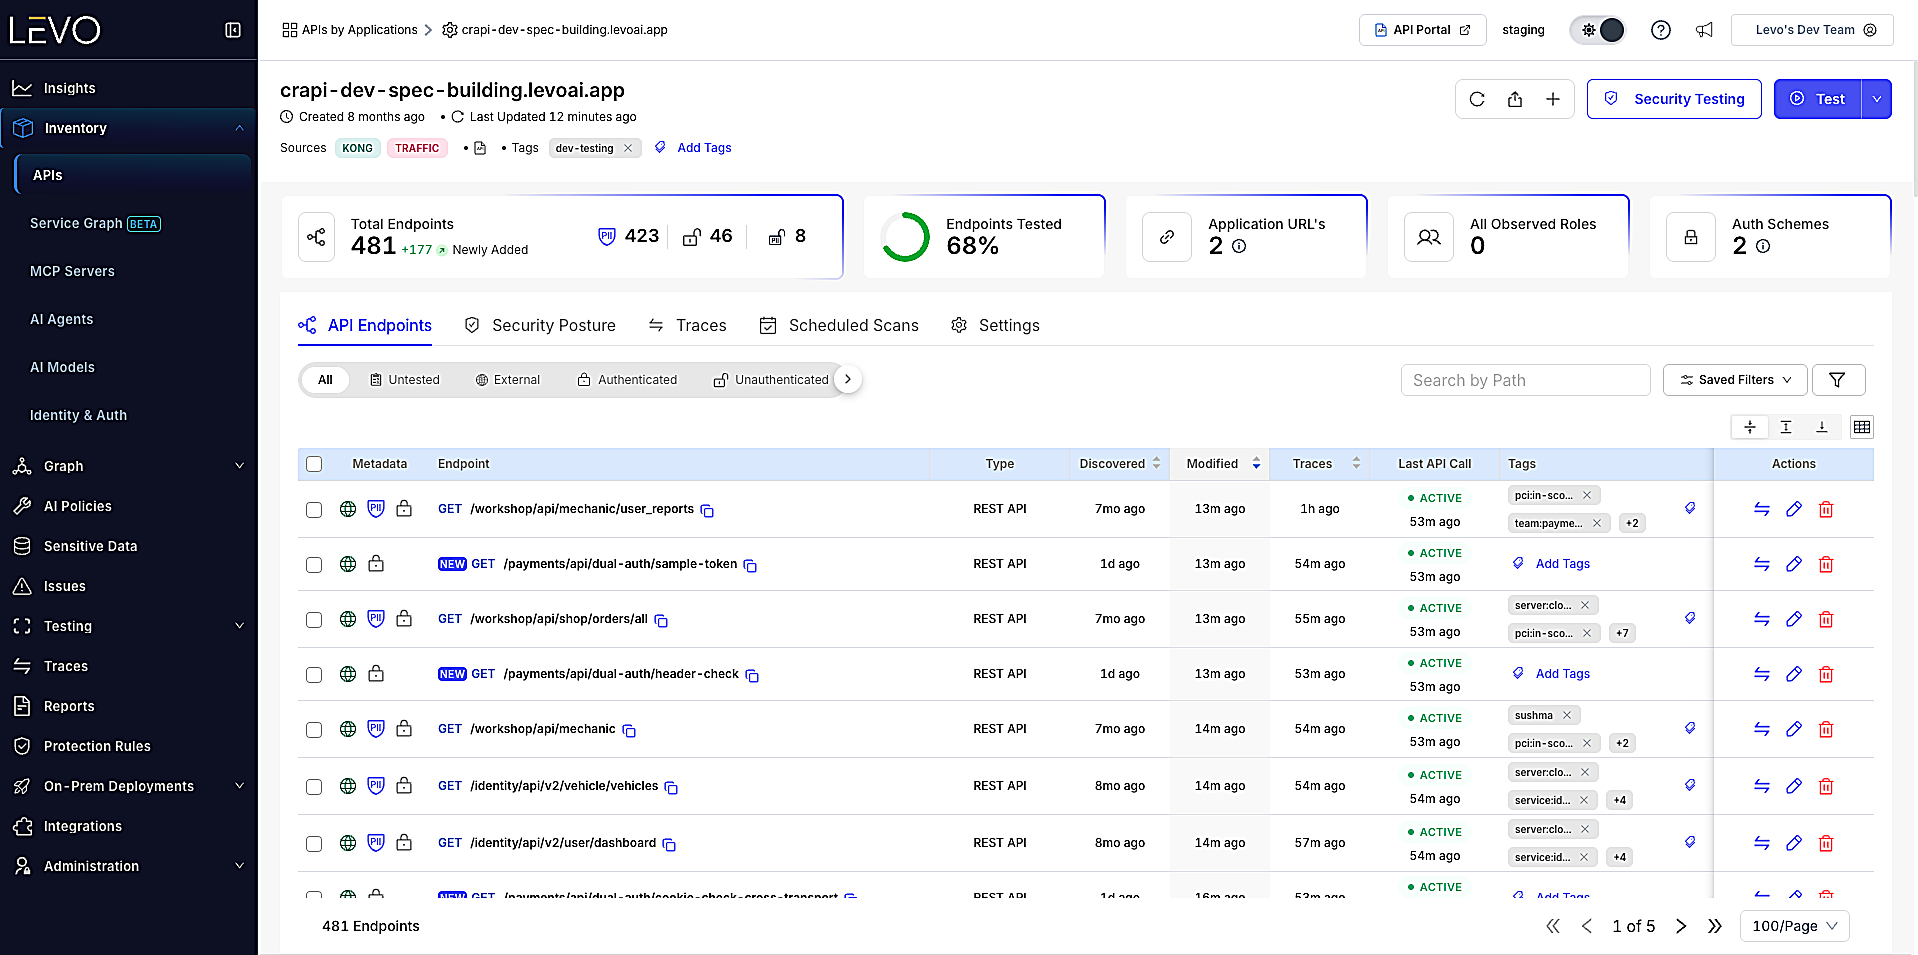
Navigate to the Application whose endpoints you want to push, and open its Endpoints list.
-
Select one or more endpoints using the checkboxes. A footer action bar appears once at least one endpoint is selected — click
Push to Gatewayon it.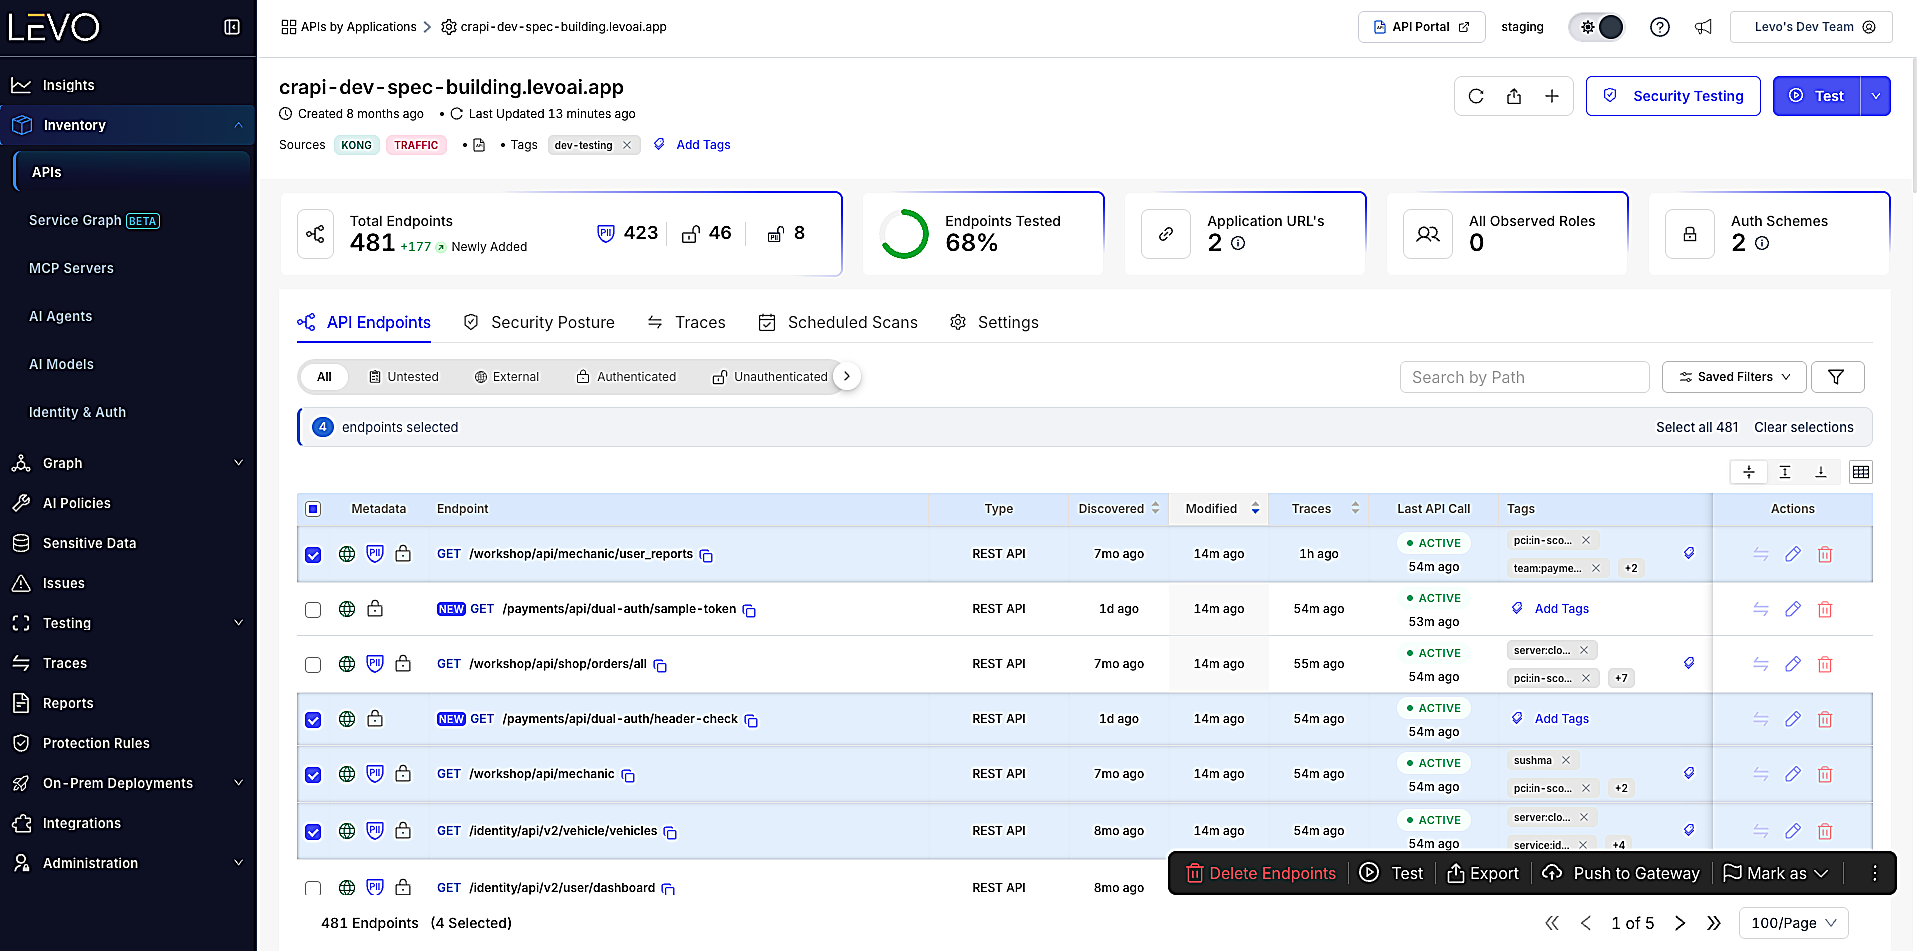
-
In the dialog, choose the saved WSO2 connection under
Gateway connection, then clickPush.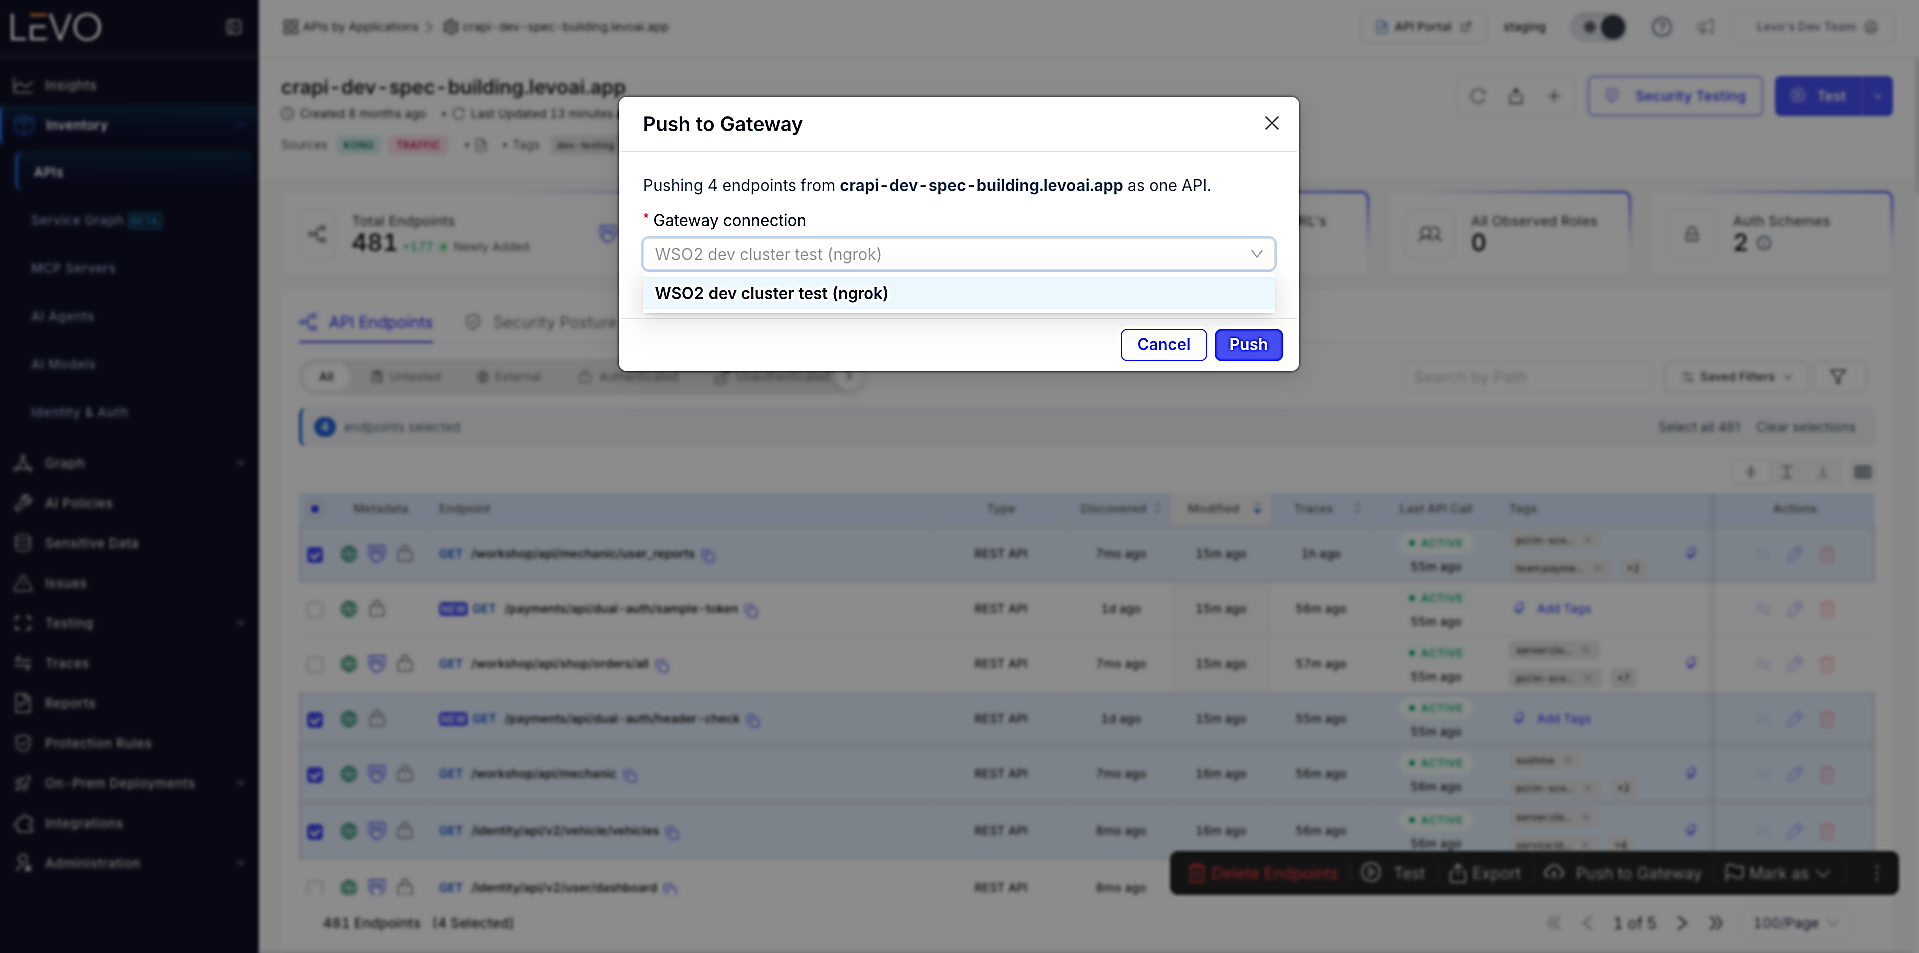
If no WSO2 integration has been added yet, this dialog shows an empty state prompting you to add one first.
A single push is limited to 200 endpoints. If you select more, reduce your selection before pushing.
-
After the push completes, the result is shown per outcome:
Outcome Meaning Pushed to WSO2 The endpoints were created as one new WSO2 API. A View in WSO2link opens the new API directly.Already exists An API with the same context path and version already exists in WSO2 — Levo does not update it on re-push. Authentication failed The saved integration's credentials were rejected — check them under Settings → Integrations → WSO2.Could not reach WSO2 A network or URL issue prevented Levo from reaching the gateway. Rejected by WSO2 WSO2 rejected the generated API definition; the reason from WSO2 is shown alongside this message. 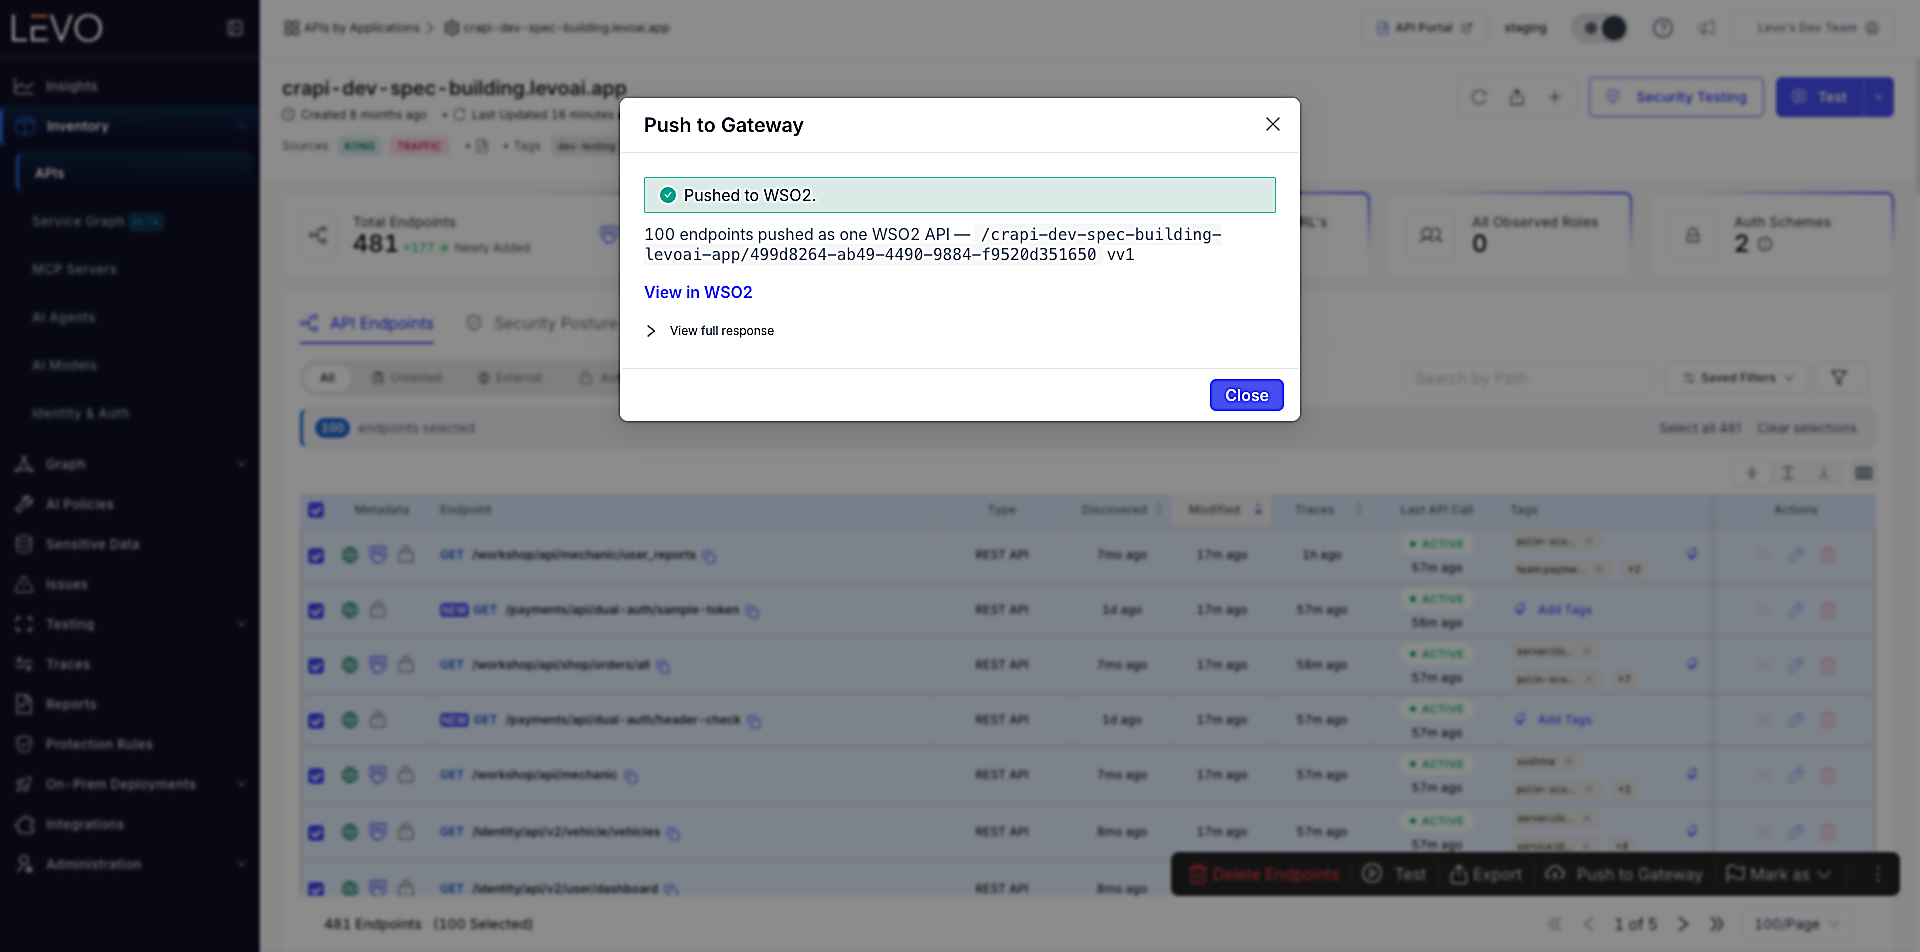
If some endpoints succeed and others fail in the same push, the result shows a breakdown (for example "3 created, 199 failed") instead of a single outcome.
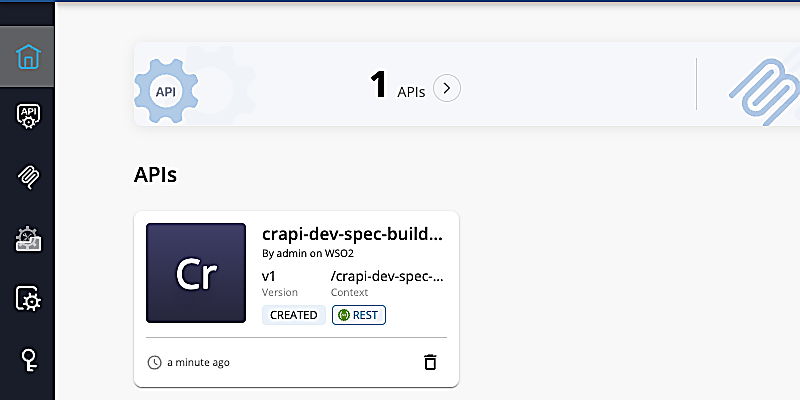
Clicking View in WSO2 (or opening the WSO2 Publisher directly) shows the new API in CREATED state, ready for you to review, publish, and deploy on your own schedule:
Once pushed, publishing, deploying, and applying policies to the new API are done from within WSO2.